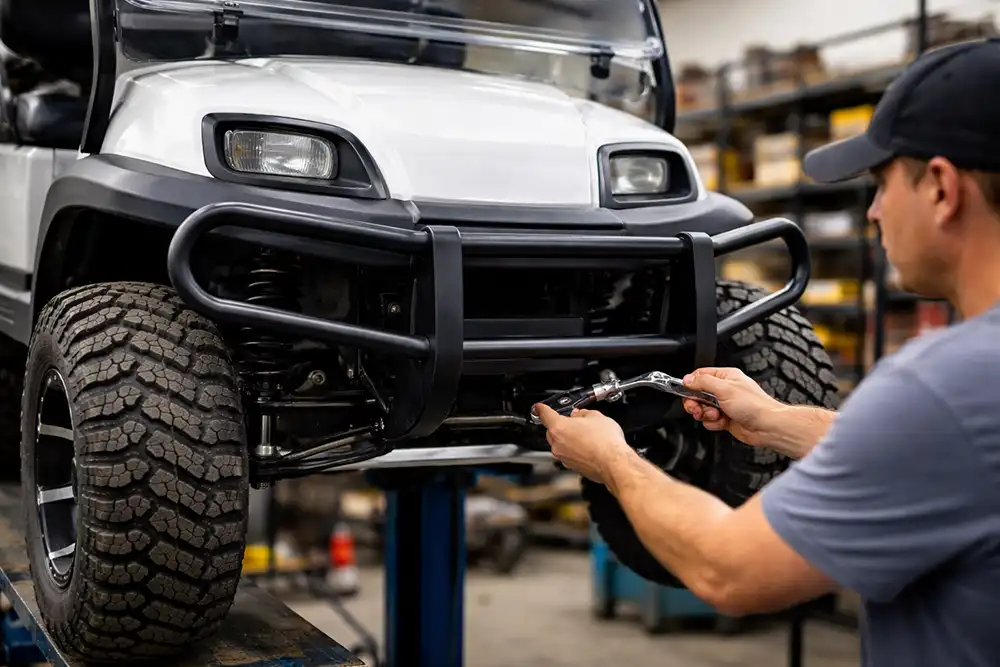
Adding a brush bar to your golf cart is one of the most popular customization upgrades for both style and protection. These front-mounted bars give your cart a rugged off-road appearance while also protecting the front body panels, headlights, and bumper from branches, debris, and minor impacts.
Many modern golf carts—especially lifted or street-ready models—look great with a brush bar. However, most carts don’t come with one installed from the factory. That means owners either install one themselves or visit a professional service center for a custom fit.
In this guide, we’ll walk through how to install a brush bar on a golf cart, the tools required, common compatibility issues, and when it’s best to have professionals handle the installation.
What Is a Golf Cart Brush Bar?
A brush bar is a protective metal guard mounted to the front of a golf cart. It’s similar to the grille guards or bull bars commonly seen on trucks and off-road vehicles.
Brush bars serve two main purposes:
Protection
They protect the front of the cart from:
- Tree branches
- Trail debris
- Small impacts
- Parking lot bumps
Style
Brush bars also dramatically change the look of a cart by giving it:
- A rugged off-road appearance
- A more aggressive front profile
- A custom-built feel
Many owners add brush bars when upgrading their cart with:
- Lift kits
- Larger tires
- LED lighting
- Custom wheels
Golf Carts That Can Use Brush Bars
Brush bars are available for many modern golf cart platforms, including:
- ICON golf carts
- Evolution golf carts
- Epic carts
- Bintelli models
- Tomberlin carts
- ActivEV golf carts
However, mounting brackets can vary between manufacturers, so it’s important to confirm compatibility before purchasing.
Some installations may require custom brackets or drilling, depending on the cart design.
Tools You’ll Need for Installation
Installing a brush bar is usually a simple project that can be completed in 30–60 minutes.
Common tools include:
- Socket wrench set
- Ratchet or impact driver
- Allen wrenches
- Drill (if new holes are required)
- Measuring tape
- Marker for alignment
Many kits include mounting brackets and hardware, but always verify the kit contents before starting.
Step-by-Step: Installing a Golf Cart Brush Bar
Step 1: Park and Secure the Cart
Start by parking your golf cart on a flat surface.
For safety:
- Turn off the cart
- Set the parking brake
- Remove the key
This prevents the cart from moving while you work.
Step 2: Locate the Front Mounting Points
Most brush bars attach to existing frame or bumper mounting points.
Look underneath the front of the cart for:
- Frame rails
- Front bumper mounts
- Pre-drilled accessory holes
These points provide the strongest support for the brush bar.
Step 3: Attach the Mounting Brackets
Position the brush bar mounting brackets against the frame.
Using the provided bolts:
- Align the bracket holes with the frame holes
- Insert bolts loosely at first
- Do not fully tighten yet
Leaving the bolts slightly loose allows room for adjustment.
Step 4: Position the Brush Bar
Next, lift the brush bar into place and align it with the mounting brackets.
This step is easier with two people, especially for larger brush bars.
Insert the bolts that connect the brush bar to the brackets and tighten them slightly.
Step 5: Align the Brush Bar
Before fully tightening the hardware, step back and visually check the alignment.
Make sure the brush bar:
- Sits level across the front of the cart
- Is centered with the headlights
- Clears the body panels properly
Adjust the position if needed.
Step 6: Tighten All Hardware
Once everything is aligned correctly, fully tighten all bolts using a wrench or socket.
Check that:
- The brush bar feels solid
- There is no movement
- All hardware is secure
Loose hardware can cause vibration while driving.
Step 7: Test for Clearance
Turn the steering wheel fully left and right to make sure the brush bar does not interfere with:
- Tires
- Suspension components
- Lights or wiring
If everything clears properly, the installation is complete.
When Installation May Be More Complicated
While many brush bars install easily, some carts require additional work.
Common challenges include:
- No factory mounting points
- Aftermarket bumpers already installed
- Lift kits changing frame geometry
- Wiring for lights running through the mounting area
In these situations, custom brackets or professional installation may be required.
Why Many Owners Choose Professional Installation
If you want a clean, professional finish, a golf cart service center can handle the installation quickly.
Professional technicians can:
- Confirm compatibility with your cart
- Install brush bars safely
- Add custom lighting integration
- Ensure proper mounting strength
If your cart already has modifications like lift kits or lighting systems, a service center can also make sure everything works together correctly.
For owners who want custom upgrades or professional installation, the technicians at Central Coast Carts can help with golf cart modifications and accessories.
Other Popular Golf Cart Front-End Upgrades
Brush bars are often installed alongside other front-end accessories.
Popular upgrades include:
- LED light bars
- Custom front bumpers
- Winches for utility carts
- Accent lighting
- Custom grills
Combining these upgrades can dramatically change the look of a golf cart.
Safety Tips When Installing a Brush Bar
Always follow these safety guidelines during installation.
Use Proper Hardware
Only use bolts designed for the brush bar and frame mounting points.
Avoid Overtightening
Overtightening bolts can strip threads or damage brackets.
Check After First Ride
After driving the cart for a short period, recheck the bolts to ensure they remain tight.
FAQ: Golf Cart Brush Bars
Most modern carts can support them, but mounting brackets vary by manufacturer and model. Always check compatibility before purchasing.
No. While they add style, they also protect the front of the cart from branches, debris, and minor impacts.
Yes. Many brush bars install with basic tools and take less than an hour to complete.
When installed properly, it should not affect steering or suspension performance.
Most do, but lift kits can sometimes change mounting points. In these cases, custom brackets may be needed.
If your cart has other modifications or requires custom mounting, a service center can ensure the brush bar is installed safely and correctly.
Final Thoughts
Installing a golf cart brush bar is a simple upgrade that adds both protection and personality to your cart. Whether you’re driving on trails, around property, or through busy neighborhoods, a brush bar helps protect the front end while giving your cart a rugged custom appearance.
While many owners install brush bars themselves, some carts require custom mounting or professional adjustments—especially if other modifications are involved.
If you want expert installation or help customizing your golf cart, the team at Central Coast Carts can assist with upgrades, accessories, and professional service to make sure everything fits and functions properly.
California Golf Cart Service Center
231 Beckett Pl #A/B Grover Beach, CA 93433
805-225-5228
[email protected]